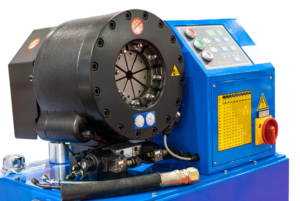
Hose crimping can provide a safer, more reliable hose assembly than many other hose fitting attachment options. Ensuring you are taking the right steps to crimp your hose properly is of the utmost importance in regards to safety and system function. Follow these steps for proper hose assembly:
1. Select the hose, fittings and ferrules being used. It is important to select fittings and ferrules that are part of a coupling system (made to go together) from the SAME manufacturer. Selecting fittings and ferrules that are part of a coupling system from the same manufacturer is essential for personal safety, ensuring a proper fit and strong hold when crimping.
2. Cut the hose to the required length needed. Make sure to cut the hose ends square and clean any debris from inside the hose tube interior.
3. Measure the outside diameter (OD) of the hose preferably using a Pi tape. Be sure to measure both sides of the hose, because there’s a good chance one side of the hose could be larger or smaller than the other side. Verify the ferrule being used for the hose is the correct size based on OD measurements. Change the size of the ferrule if needed.
4. Slide the ferrule over the stem collar and insert the stem into the hose squarely being careful not to damage the tube. Use lubrication if necessary. If a static charge needs to be maintained, bend the helical wires inside the hose tube before inserting the stem.
5. Select the desired crimp length and crimp OD using the manufacturer’s recommendations. Following the manufacturer’s recommendations are critical for personal safety and to achieve a successful hose assembly. Straying from the manufacturer’s recommendations can result in hose failure and possible injury.
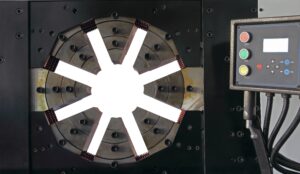
6. Select the proper die set according to the manufacturer’s recommendations and place the hose assembly inside the die opening.
7. Rotate the hose as the crimp dies just make contact with the ferrule for a nice, even crimp around the entire ferrule. Keep an eye on the ferrule to make sure it’s lined up properly to achieve the desired crimp.
8. Crimp the ferrule to the desired diameter, retract the dies and remove the hose assembly.
9. Using a caliper, measure the crimp diameter of the hose assembly making sure it meets the manufacturer’s specifications.
10. If the OD is too large, recrimp the ferrule until it meets the manufacturer’s required specification. If the crimp diameter is too small consult the coupling manufacturer.
Following these 10 steps, will put you on right path towards making a successful hose assembly. Accurately measuring both hose ends and following manufacturer recommendations being the cornerstones of that success. Check out our hydraulic crimper program agreement to receive your FREE HYDRAULIC CRIMPER and start crimping hoses like a pro today!